When it comes to couple vlogging or filming videos with multiple videos, camera audio options tend to get messy. Martin and I are very familiar with this challenge since we travel vlog each of our adventures and have long struggled to figure out the best audio solution. In this post, we’ll discuss 2 new types of microphones that were just introduced to solve this problem.
Common Microphone Solutions for Vlogging
The most popular vlogging microphone is a shotgun or directional microphones, such as the Rode VideoMicro or Rode Video Mic Pro+. These mics deliver excellent sound quality at reasonable prices, but they have the problem of not picking up the audio on both sides of the camera. Unless of course, you have a dedicated audio person and boom operator to physically move the microphone between your subjects. But we are casual filmmakers/vloggers, so this is not an optimal solution for us.
Another solution is to use wired or wireless lavalier (lapel) microphones on each subject. This has the benefit of capturing clear audio from each subject since they each have their own microphone. However, it involves adding lots of cables and splitters to your camera if you want to record both audio tracks to the same video. You can record the audio separately, but then it takes a lot of time in post-production to sync the audio. We’ve tried this before. It works, but the editing is a timesuck.
New Microphone Solutions
Thankfully, microphone companies have addressed this problem by introducing new products. The first is a cardioid microphone that records sound on the front and back. The second is a wireless lavalier mic system with two microphones. At this point, there are many audio companies out there providing products of these natures, but in this post, we are focusing on 2 products in particular.

Option 1: Deity D4 Duo
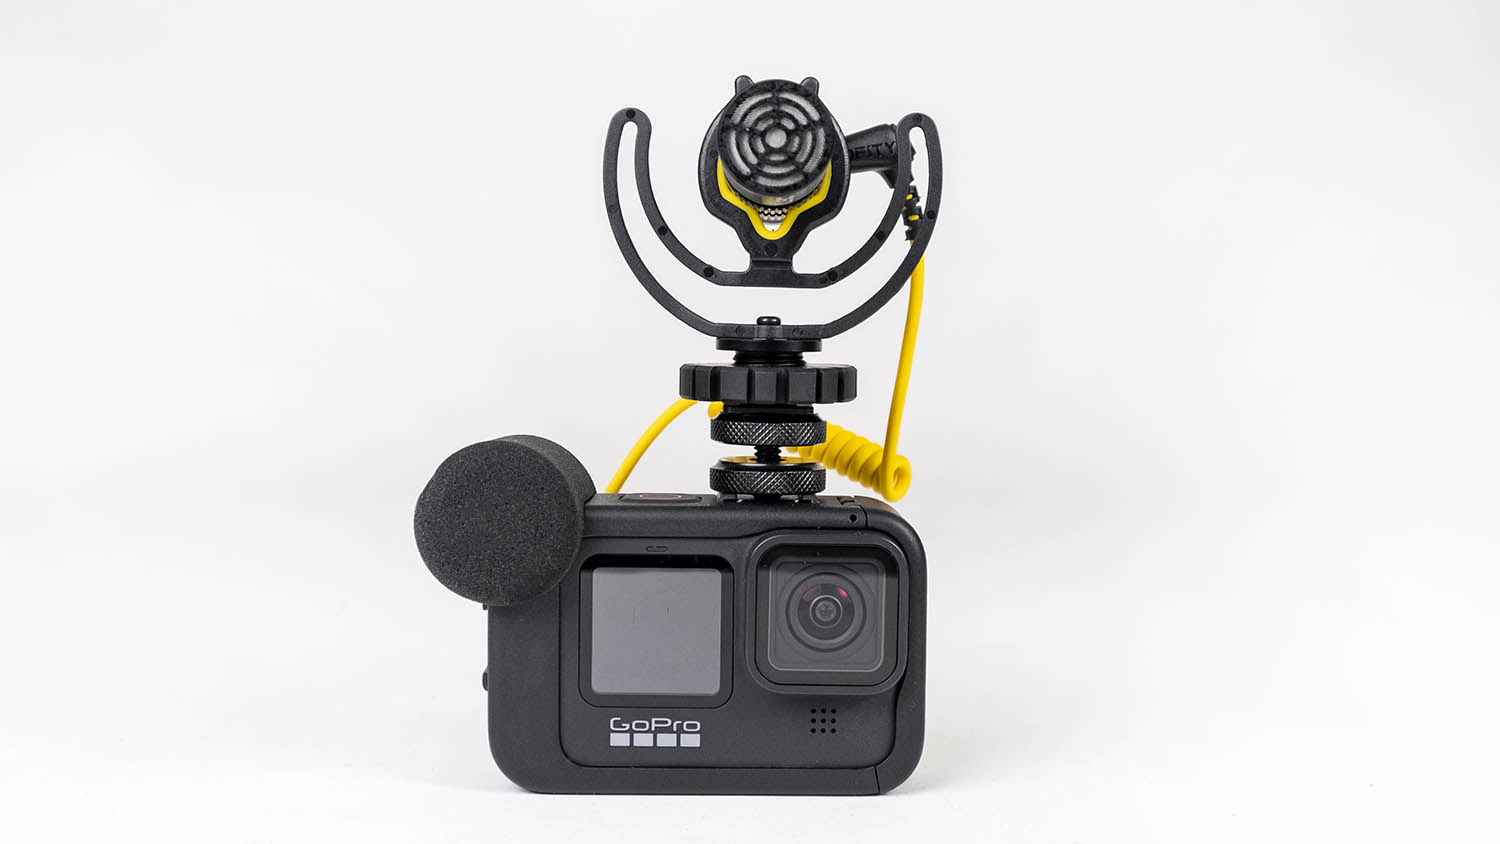
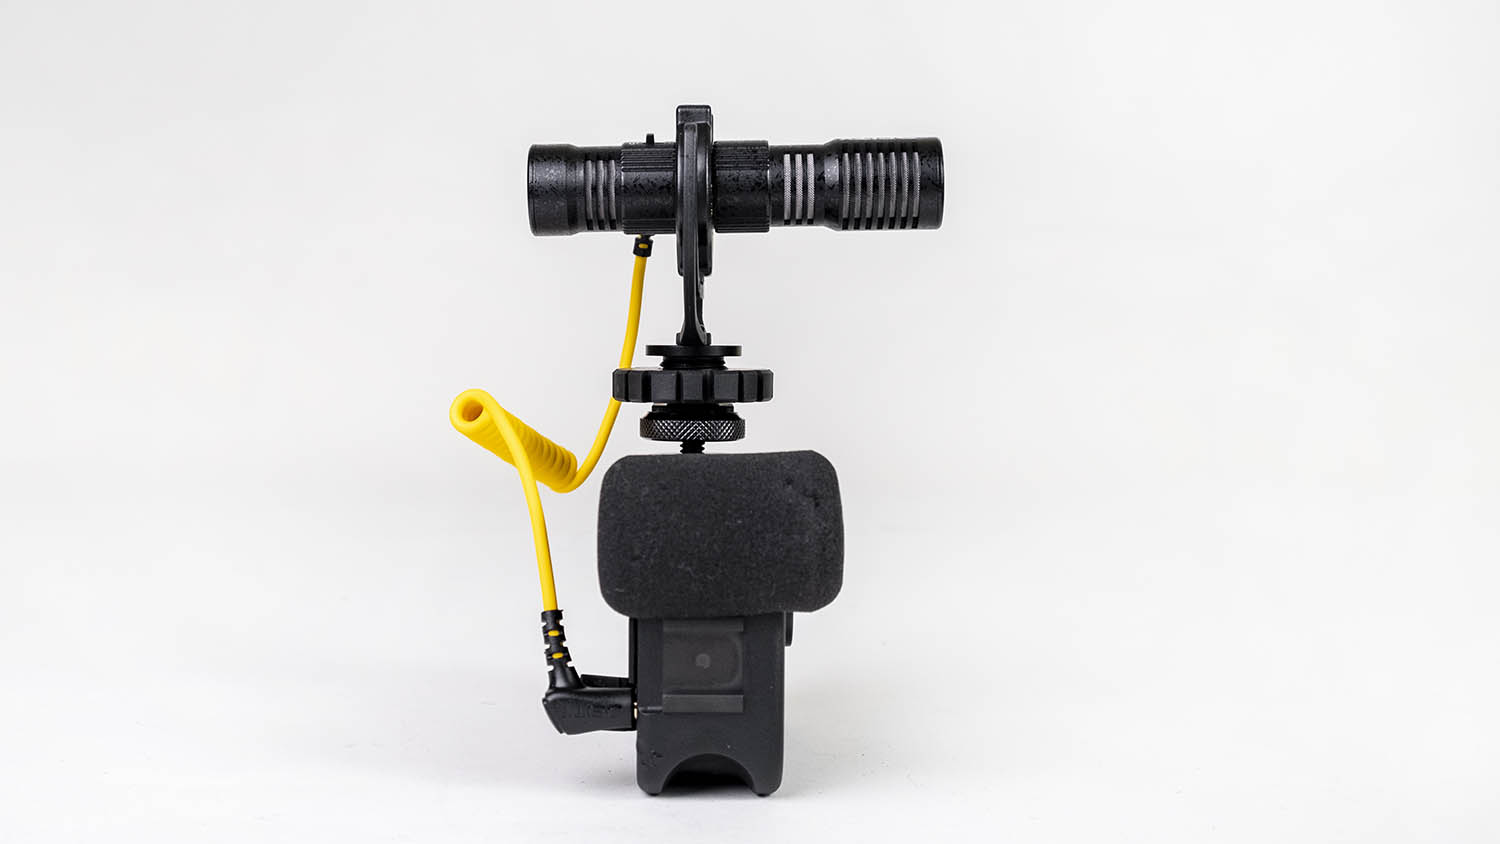
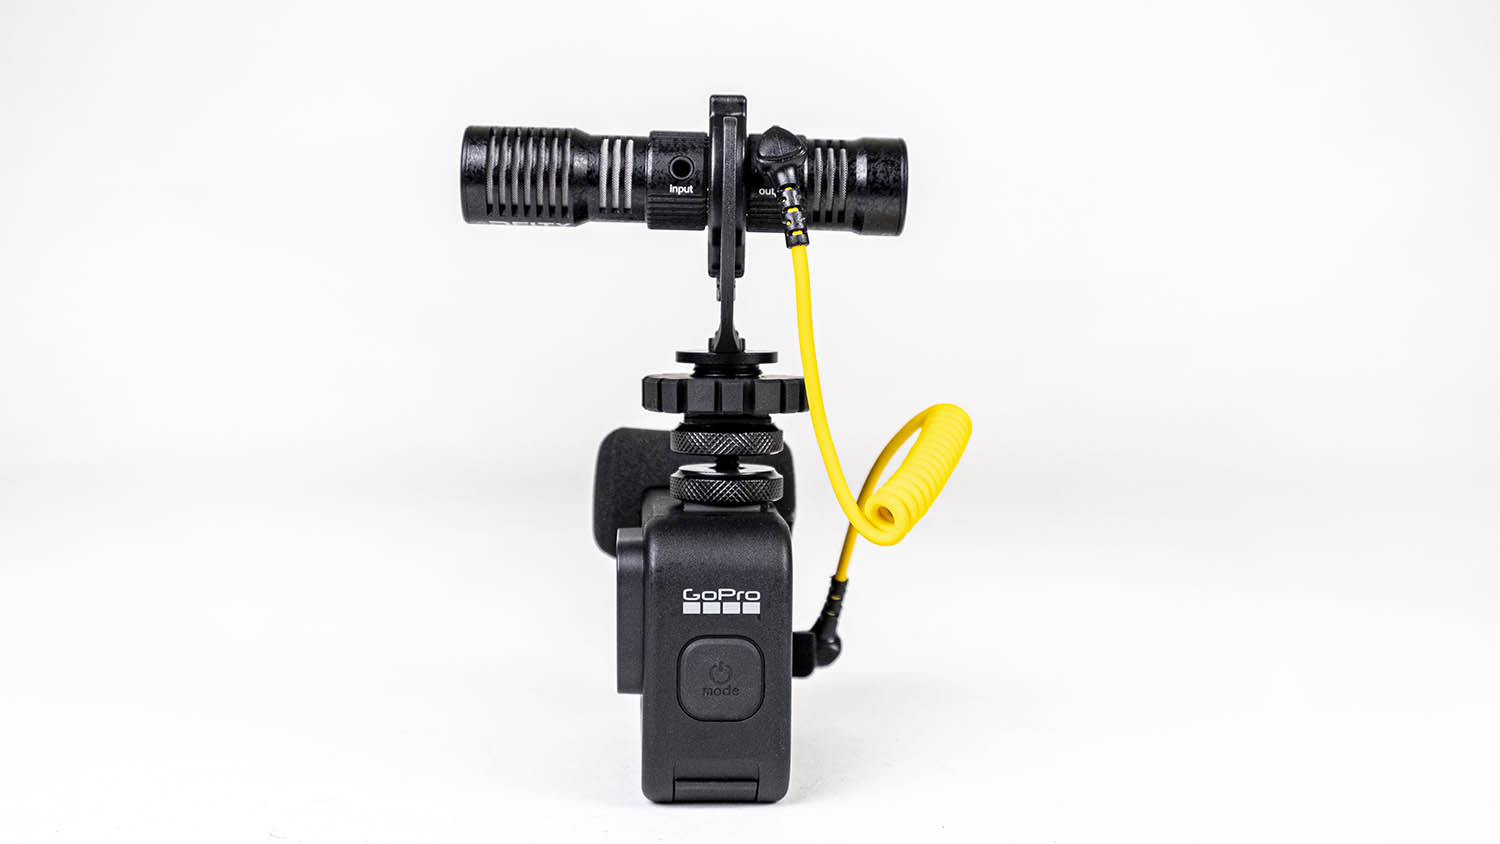
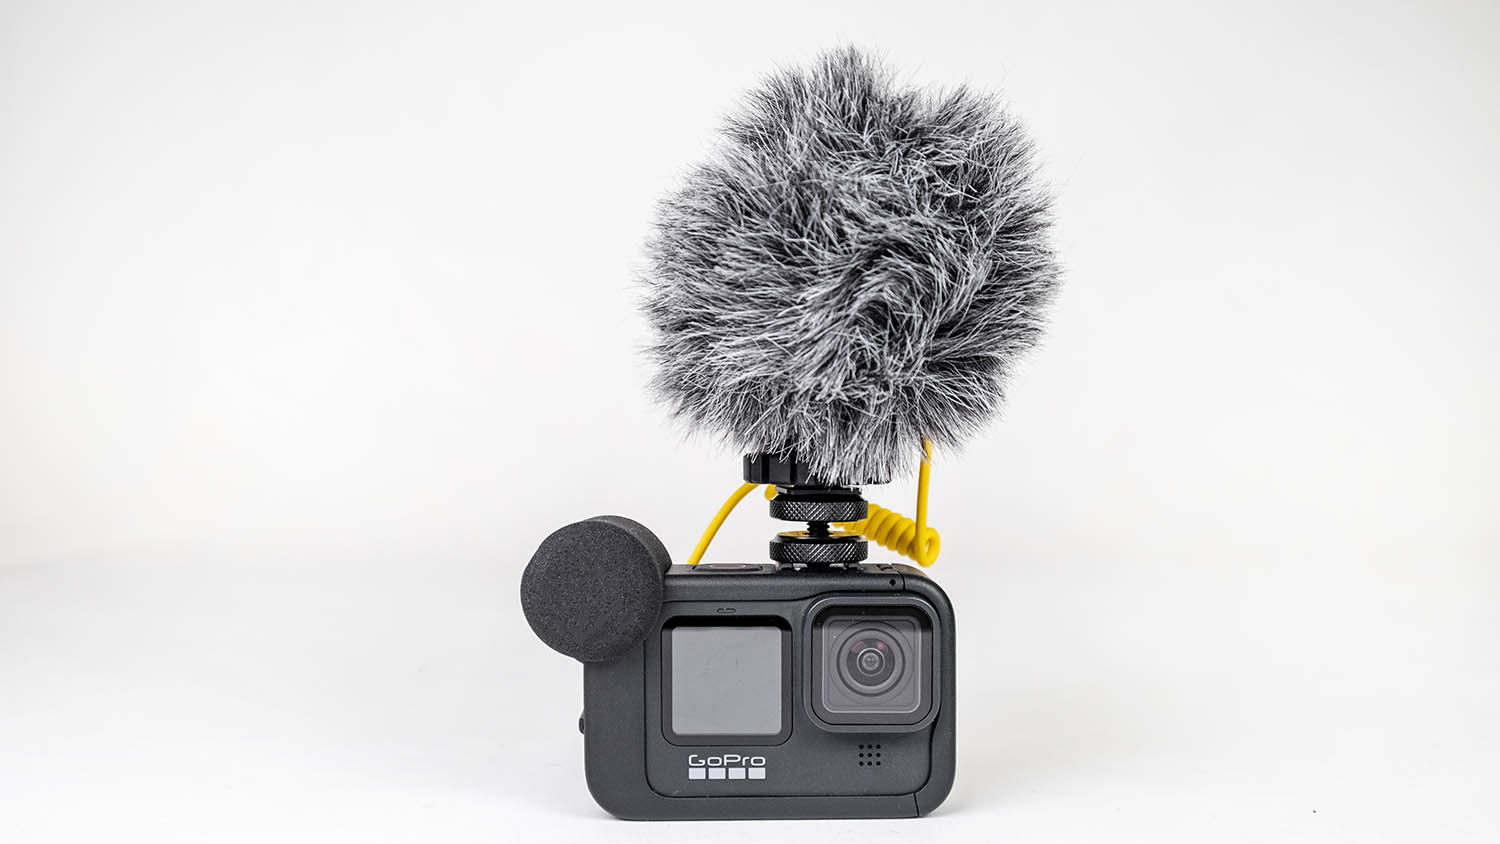
The first is the Deity D4 Duo. This tiny mic is like a Rode Wireless Go, but instead of recording sound on just one side, the Deity gives you the option to record sound from the front and the back. You can also record from just the front at the flip of a switch.
The Deity also has the very clever addition of an extra input jack for adding a wired lav or wireless lav, super handy if you have a subject moving around, or you want one audio track with extremely targeted sound.
Positive Features
- 2 capsule mic – records front and back, or just front
- Self-powered; does not require charging or battery power
- Comes with 2 windscreens (optional)
- ALSO, has an input for a wired lav or wireless lav
- Can use with DSLR, mirrorless camera, point-and-shoot, or GoPro (make sure the input is Standard Mic Plus). It can also be used with an iPhone or Android smartphone as long as you purchase the corresponding cable (lightning cable for iPhone, or TRRS cable for Android).
Drawbacks
- The 2 windscreens can be a hassle if you ever remove them (easy to lose)
- There’s the occasional sound problem — if you have this same rattling noise, make sure the cable is secured to the cold shoe mount in the little notch.
- Sound quality is good, but there are other mics out there that are better.
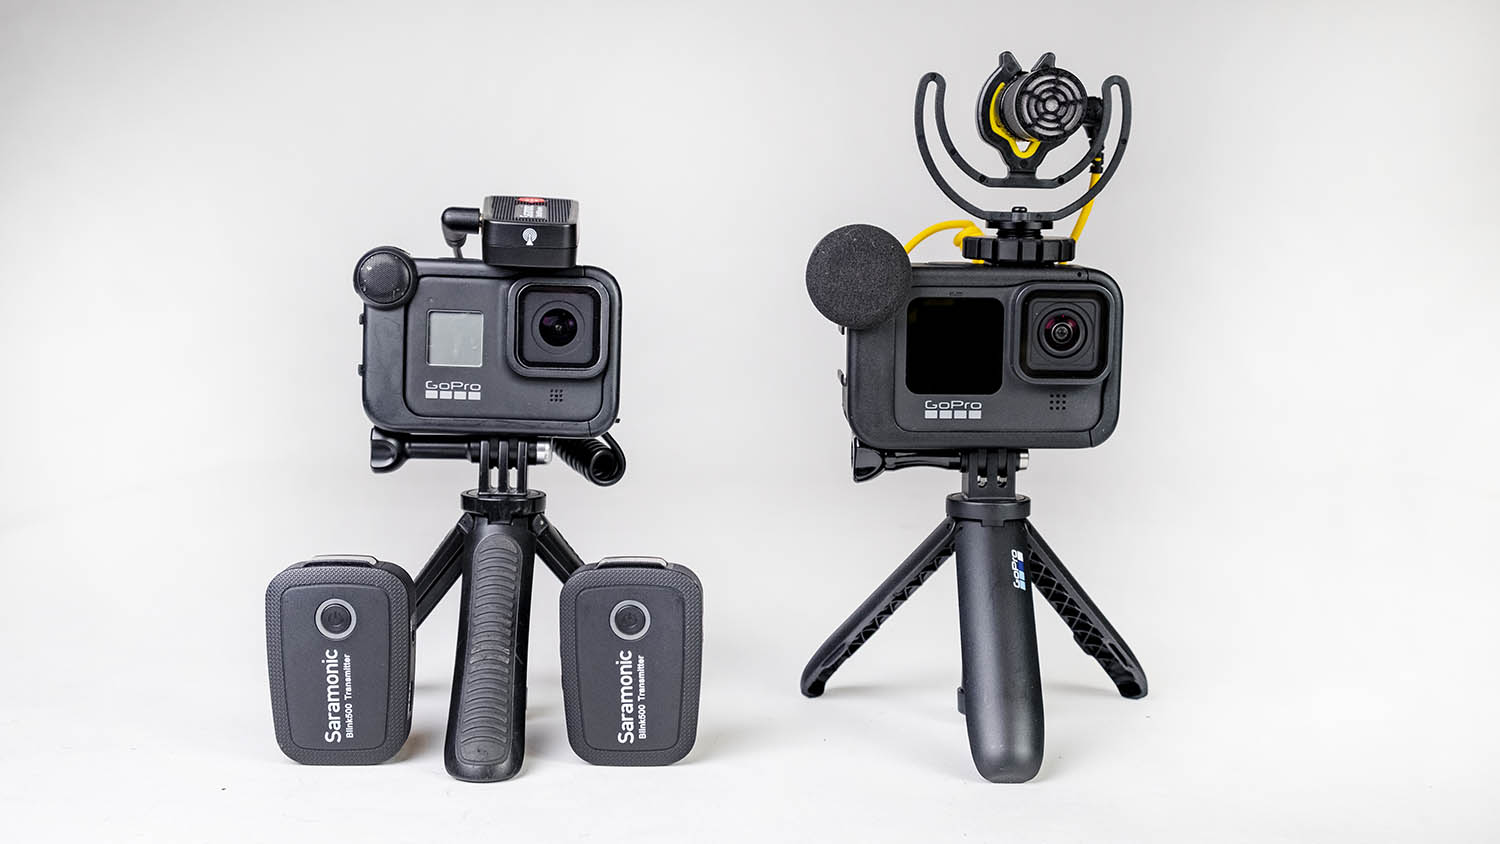
Option 2: Saramonic Blink 500
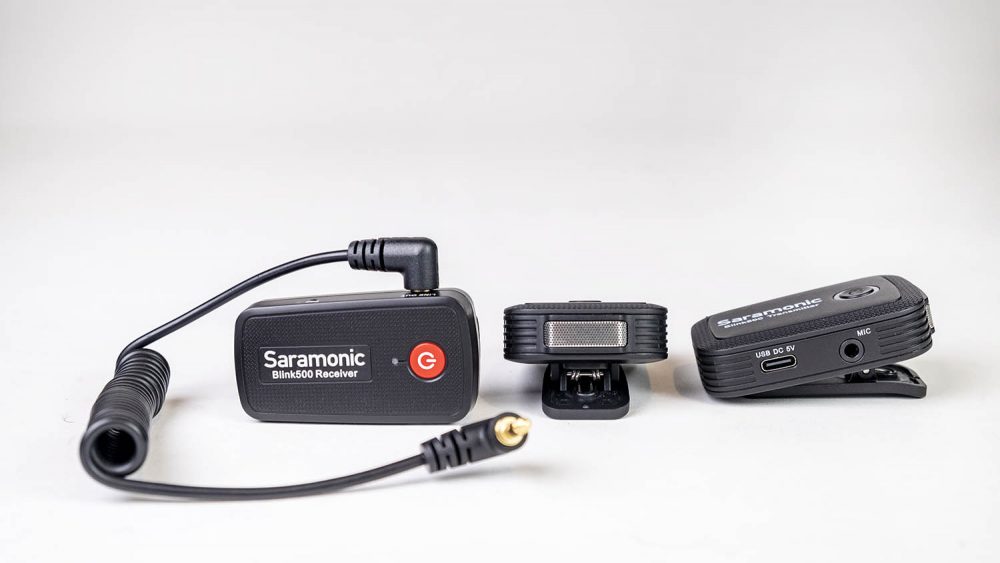
The next mic we’ll talk about is the Saramonic Blink500. This mic operates similarly to the Rode Wireless Go, but it comes with TWO transmitters instead of one. Each transmitter has a built-in mic, so you can simply clip the transmitter to your subject and be good to go. However, the built-in mics don’t have windscreens. So in windy situations or when you don’t want the transmitter to be visible, you can plug a wired lav mic into the transmitter instead.
This mic system has built-in rechargeable batteries, and you must keep 3 units (the 2 transmitters and 1 receiver) charged to use them. There isn’t an LCD screen on any of the units. Instead, you have to eyeball battery life and mic adjustment levels via colored LED lights.
The Saramonic Blink500 can be used with a DSLR, mirrorless camera, point and shoot, or GoPro (make sure it is Powered Mic Plus). It can also be used with an iPhone or Android smartphone as long as you purchase the corresponding cable (lightning cable for iPhone, or TRRS cable for Android).
Drawbacks
- 3 moving parts to keep track of and keep charged
- Super basic interface — sometimes tough to tell if they’re fully charged, paired properly, etc. Audio level adjustments are approximate.
- Built-in mic doesn’t have a windscreen, and also is large and hard to hide.
- Only records to a single audio track — does not split audio. Must get a second receiver + splitter to get stereo audio.
The Saramonic Blink 500 is our favorite 2-person mic system so far, but it has some shortcomings. However, there is a brand new Saramonic Blink 500 Pro coming out soon that addresses all of these problems, so if you have the budget, definitely get the Pro version when it is available.

Price
Finally, let’s look at price. Going with a regular shotgun or directional mic such as the Rode VideoMicro will fetch you the lowest price. There are higher-quality and larger shotgun mics out there, but their prices go up. The Deity D4 Duo is just a bit more expensive than the Rode VideoMicro, and it picks up audio in multiple directions. For a wireless mic system, the Rode Wireless Go has been the most budget option until recently. It only comes with a single mic and there currently is not an easy way to add a second mic. So if you cough up $50 more, you can get an excellent 2-mic wireless system in the Saramonic.
Just keep in mind that if you want to take full advantage of the Deity D4 Duo’s input jack, you’ll need a second mic such as the Rode Wireless Go, so this can greatly impact the price.
- Rode VideoMicro (single mic) – $60
- Deity D4 Duo (double mic) – $89
- Rode Wireless Go (single mic) – $200
- Saramonic Blink500 (double mic) – $250
In Conclusion
Which mic are you most curious about? Or have you used any of these mics? Let us know in the comments!