One of the biggest reasons I decided to buy the Canon EOS 6D was to take advantage of its built-in Wi-Fi function. The Canon 6D made headlines as it was the company’s first affordable full-frame camera, and also Canon’s first DSLR with Wi-Fi. The idea of using Wi-Fi to remote control my camera and shoot tethered sounded like some great benefits to my clients. When the Canon 6D arrived, the first function I was eager to test out was Wi-Fi, but I had a hell of a time figuring out how to set it up. It’s not as intuitive as just pressing one button and having everything work immediately. To help others avoid this headache, I put together a Canon 6D Wifi Manual below demonstrating how to enable the Wi-Fi function and connect to a smartphone. Let’s get started!
Canon 6D Wifi Manual
Part 1: Setup Canon 6D Wifi for One Device
- What You Need
- Set up Canon 6D Wi-Fi
- Configure smartphone
- Connect smartphone to Canon 6D
- Canon 6D Wifi Shortcut
Part 2: Setup Canon 6D Wifi for Multiple Devices
Part 3: Use Canon 6D Wifi to Share Images on Social Media
Part 4: Shoot Tethered with DSLR Controller (in case Wifi doesn’t work)
What You Need
- Canon EOS 6D Camera
- A compatible smartphone
- EOS Remote app (free)
Set up built-in Wifi
As a quick overview, here’s a summary of what we’re achieving. The Canon 6D uses its built-in Wifi to create a hotspot that your smartphone will then connect to. We start by configuring the Canon 6D.
Step 1:
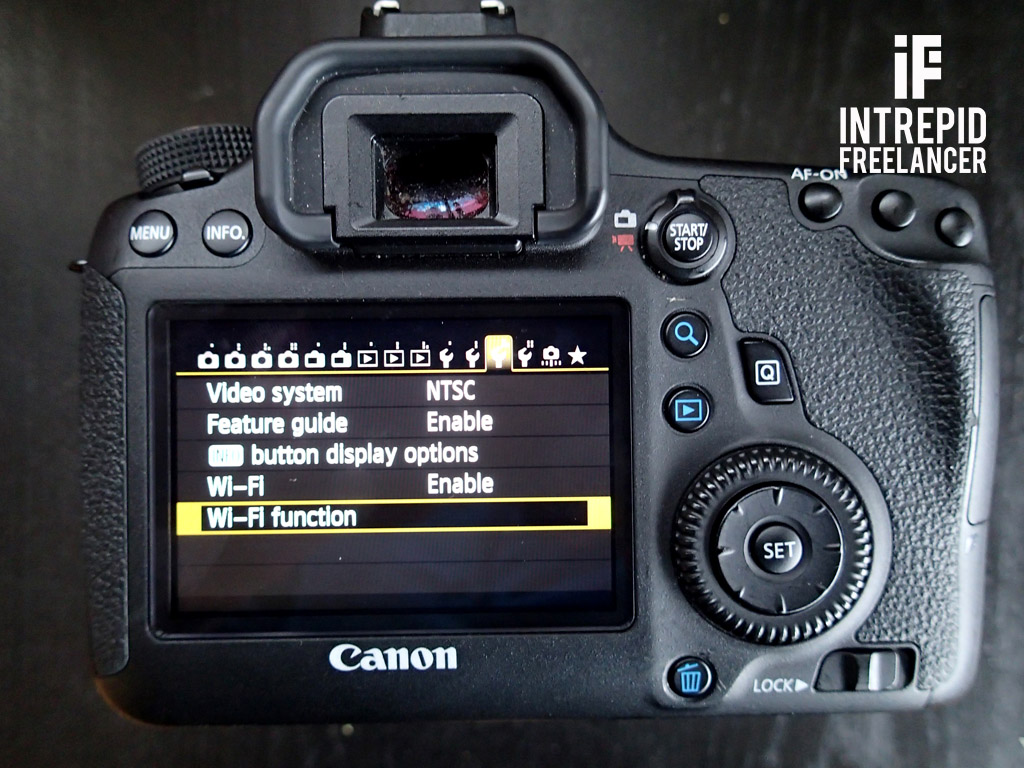
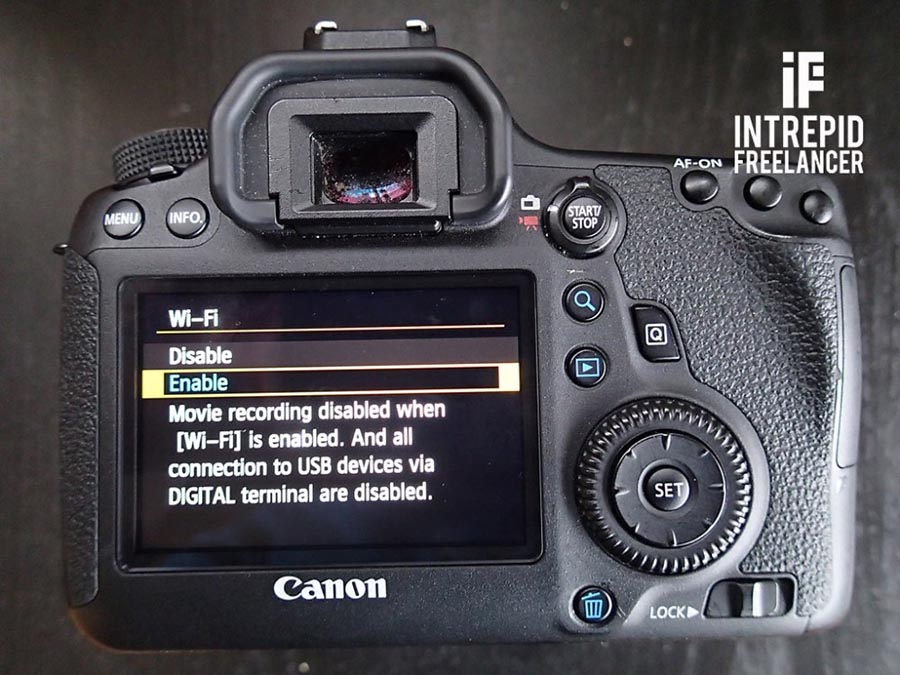
Click your Menu button and scroll through the options until you get to the Camera Settings 3 tab (the second wrench icon from the right). Note the two Wi-Fi options on the bottom of the screen. The 6D comes with Wi-Fi set to Disable by default; we’ll have to get in there to Enable Wi-Fi in order to reach the Wi-Fi function option. Make sure the Wi-Fi option (second from the bottom of the list) is set to Enable.
Step 2:
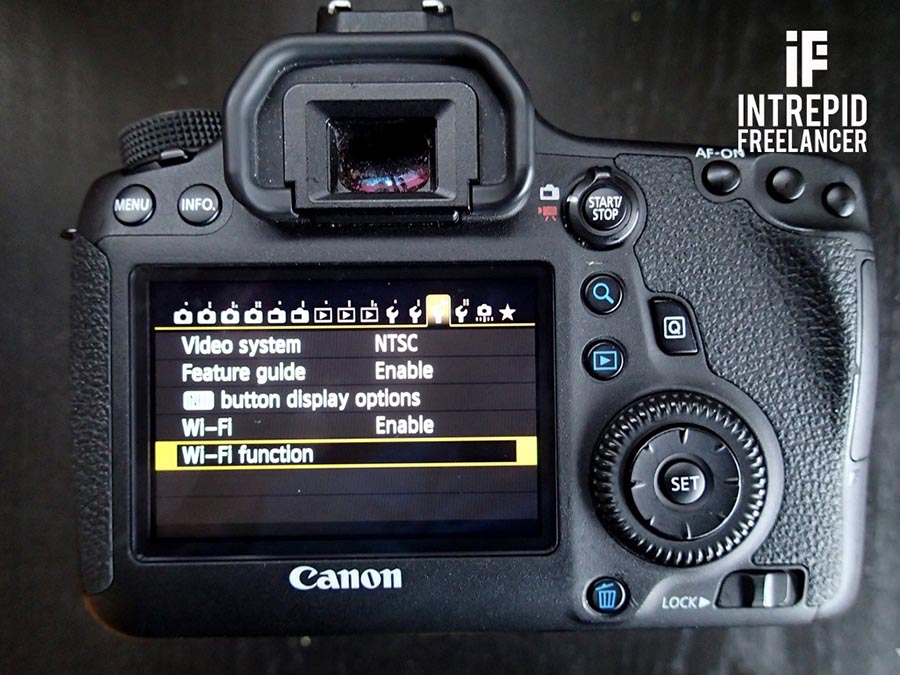
Press the Menu button to navigate back to the screen from Step 1. The Wi-Fi function option should now be accessible. Select the Wi-Fi function option.
Step 3:
The camera will prompt you with a screen asking you to register a nickname for the camera. Click OK.

 Step 4:

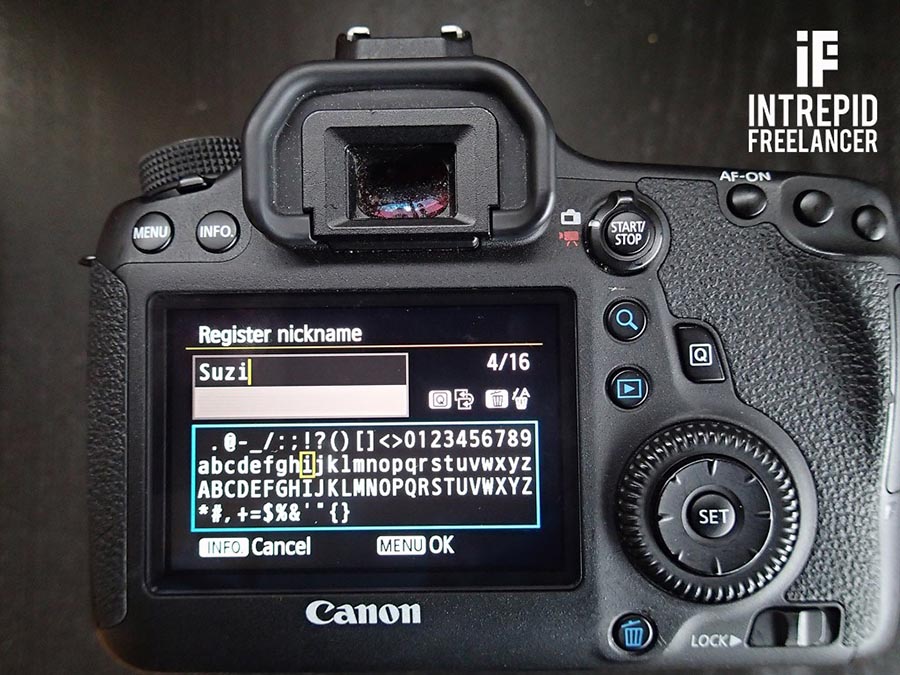
The above screen will pop up, allowing you to create a nickname with up to 16 characters. This will be the name of the camera’s WiFi network that your smartphone will connect to at a later point. For the sake of easily identifying the network, I nicknamed the camera with my own name. To input characters, use the Q button to switch from the upper text block to the bottom virtual keyboard, and use the big dial to select characters. The Trash Can button is your delete key if you make a mistake. When you’re done inputting your nickname, hit the Menu button to proceed.
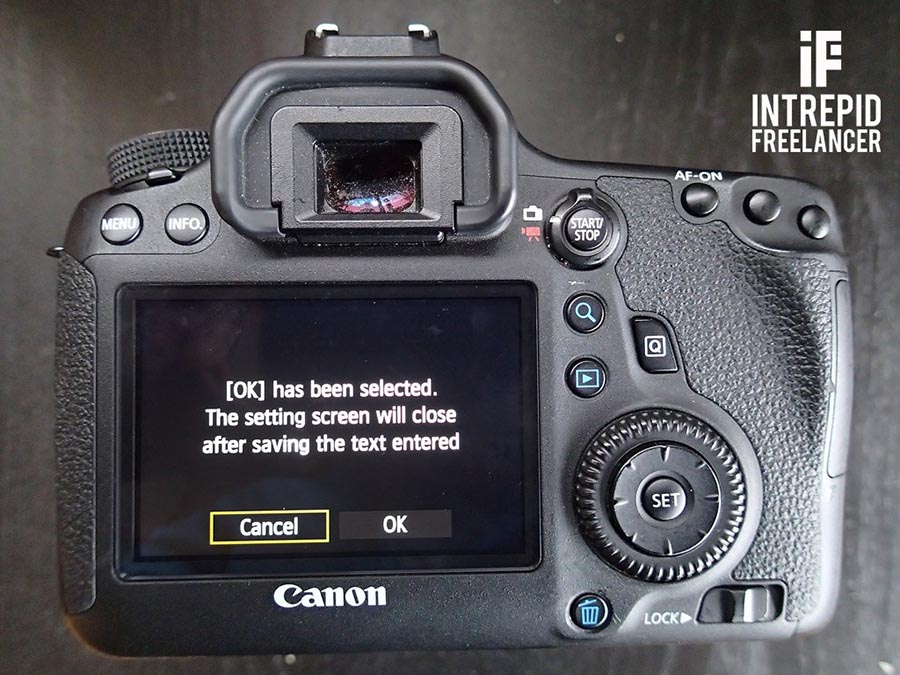 Step 5:

The above screen will appear. Hit OK.
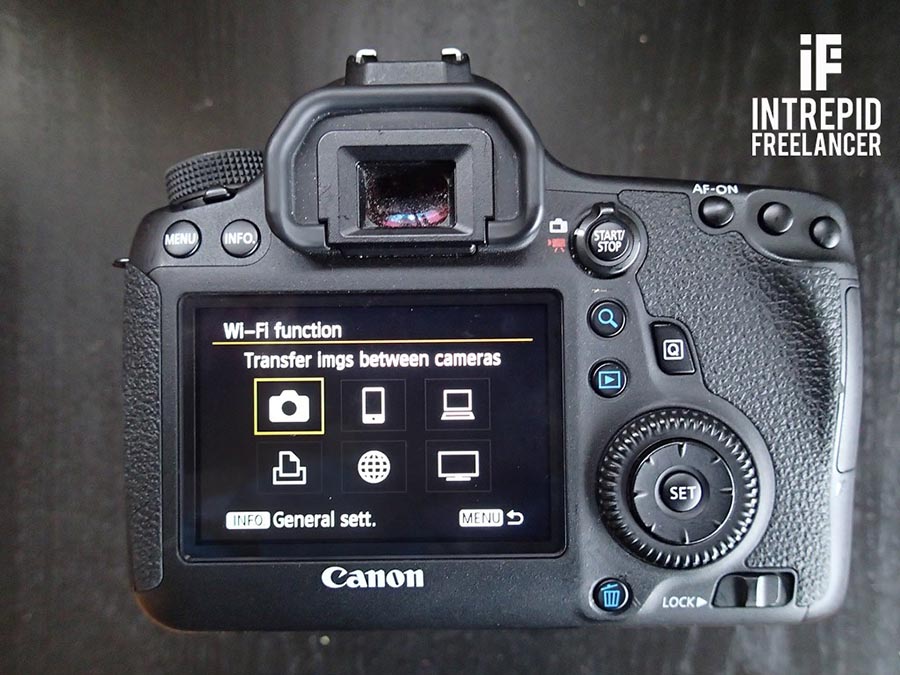 Step 6:

You’ll now come to the main Wi-Fi function menu that you will regularly interact with when using the Wi-Fi function on the camera. These are the various ways you can connect your camera via Wi-Fi. Personally, I tend to stick to the top row of options the most: Transfer images btw cameras, Connect to smartphone, and EOS Utility. In this demo, I’ll select Connect to smartphone.
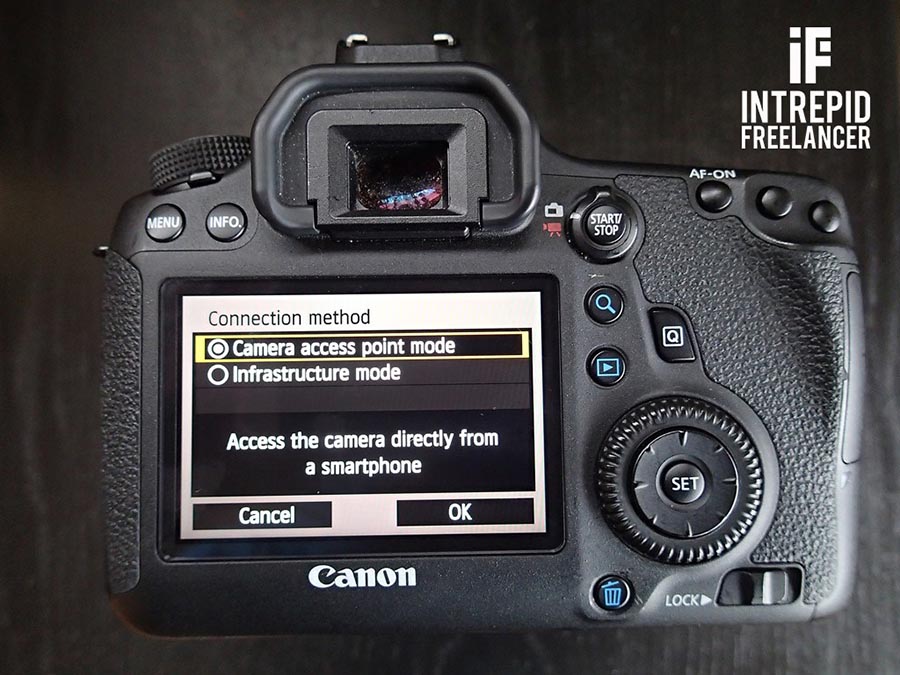 Step 7:

The first time you access the Connect to smartphone option, the top screen will appear. Hit OK.
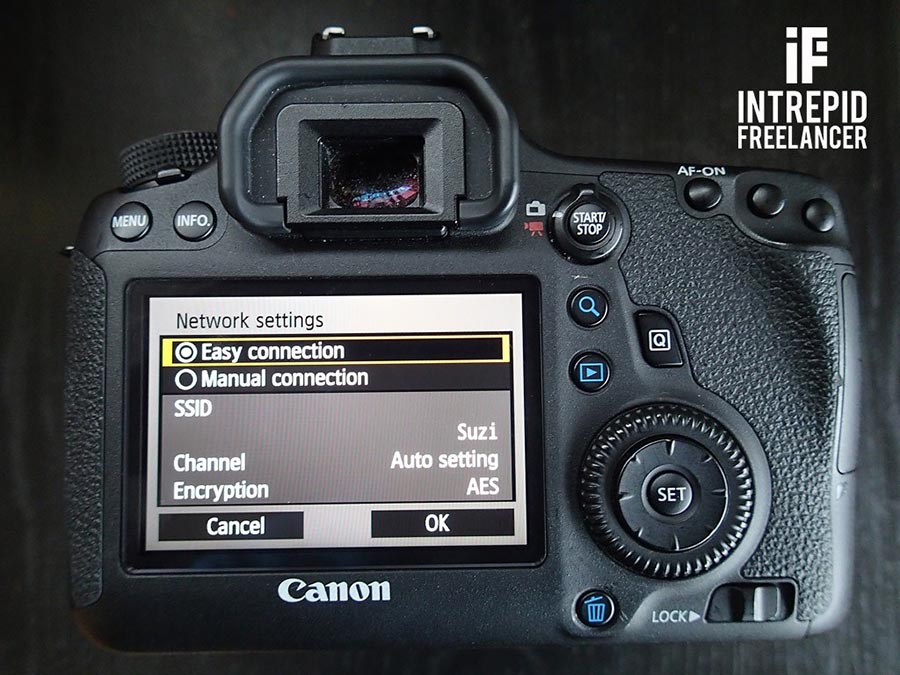 Step 8:

The above screen will appear next. Note the nickname you chose will pop up on the screen. Hit OK.

Configure Smartphone
Next, we need to set up your smartphone’s Wifi to connect it to the Canon 6D. In this demo, I’m using the Samsung Galaxy S III. The exact instructions from here on out may vary depending on the smartphone model you are using.
Step 9:
On your smartphone, head over to the Wi-Fi function and search for the nickname that you input into your camera. Your camera has essentially created its own wireless network, and your smartphone device must now connect to it. Select the nickname, and input the encryption key from step 10.

Step 10:
If your smartphone successfully connects with your camera, the below screen will pop up. Tap the Pairing icon to continue. If your camera and your phone do not connect, try pressing a button on your camera to wake up the screen or restart the phone.

Step 11:
If you haven’t already, make sure you have the free EOS Remote app downloaded to your smartphone. Start the app and if your camera is successfully connected, you should see two options. Camera Image Viewing lets you see all of the images the 6D has taken. Remote Shooting allows you to control your camera remotely via your phone.

Connect Smartphone to Canon 6D
Step 12:
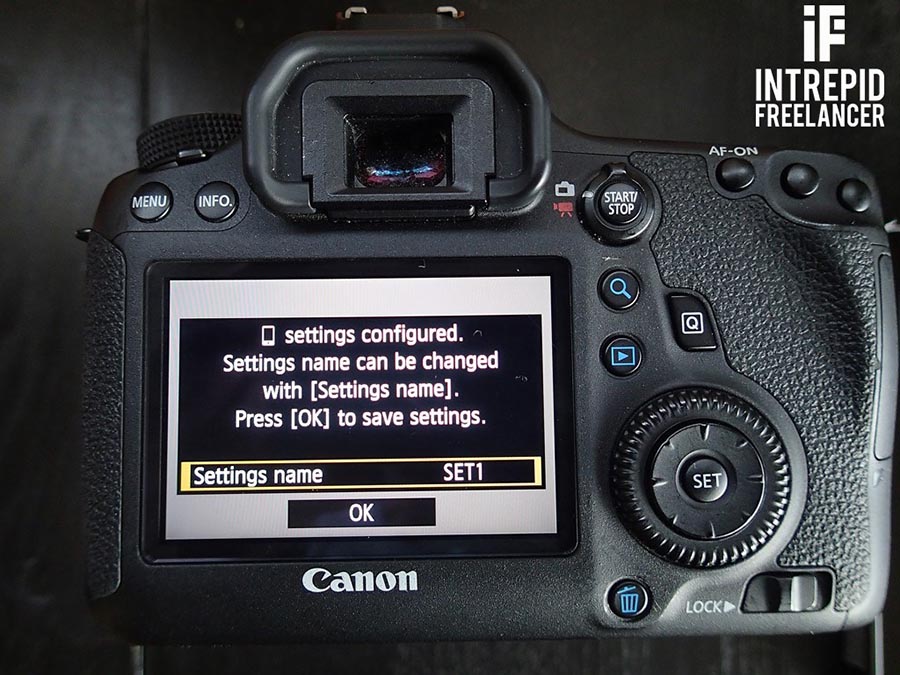
After successful connection, your camera will prompt you for one last thing: the ability to name your settings. This is important if you plan on connecting multiple devices to your camera, such as a second smartphone or perhaps a tablet. To custom name the setting, make sure the Settings name is highlighted, and then hit the Set button. By default, settings are named Set 1.
Step 13:
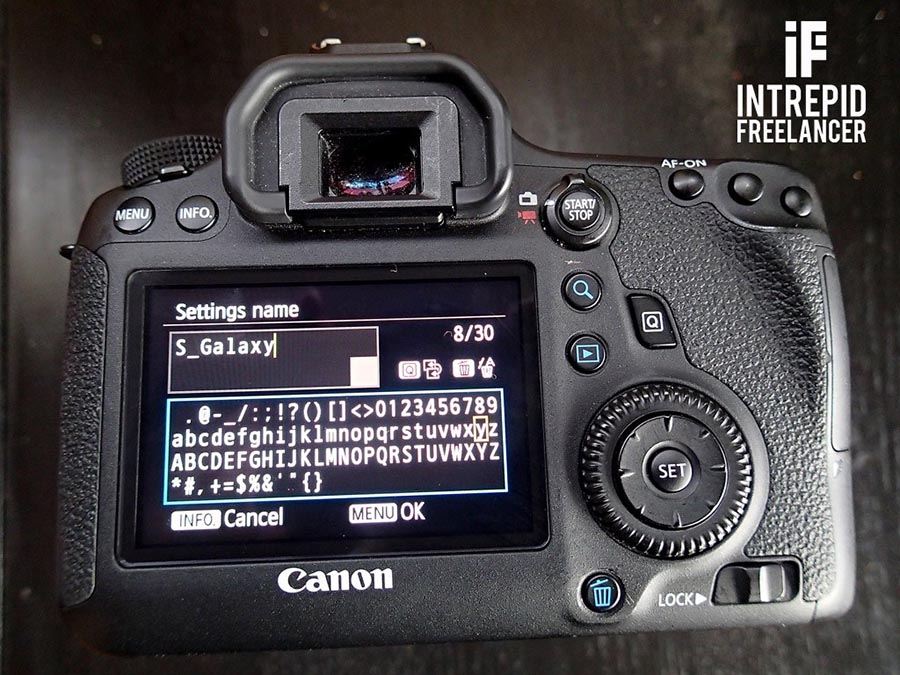
If you opt to custom name the set, input your name of choice into the camera. I like to name the setting after the device that I have connected to. In this case, it’s my Samsung Galaxy. Hit the Menu button when you’re done, and that’s it!
Canon 6D WiFi Shortcut:
If you want to access the Wi-Fi function in the future, don’t worry. You won’t have to repeat all of these steps again. Instead, you can enable Wi-Fi from your menu’s Quick Control screen (the Q button). Simply head over to the Wi-Fi icon on the far right, and select it to Enable or Disable Wi-Fi.

In Conclusion
The Canon 6D is a popular camera option for being the company’s first affordable full-frame DSLR that also has built-in Wifi. However, the Wifi is not very intuitive to set up the first time you use it. This visual guide helps you set up Wifi on the Canon 6D and connect it to your smartphone for remote shooting or downloading of images.
For more information on how to set up a second Wi-Fi network for connection to second device (ie. a tablet), the steps are MUCH shorter and are explained in part 2 of the article series.
Great help, txs! I am looking foward to part2, I cant get a second device registered 🙁
Thank you for your help!
This tutorial (parts 1 and 2) is very good and applies equally well to the new Canon iOS app released for 2015.
Suzi, Thanks a million! I had tried to figure this out with a few other resources to no avail. With your detailed instructions and accompanying photos, I was connected to a second device in under 10 minutes. Thanks for sharing. Much appreciated!
Awesome!! Always glad to help. I’m very happy it worked out for you 🙂 Happy shooting.
I too was exited by the WiFi in my new 6d, but alas I’ve gotten it to connect once, the day I got the camera, and it just won’t work anymore. In the eos app there’s no camera available even though I’m connected. Soni just don’t bother anymore.
The WiFi can indeed be a bit finicky. I also have connection issues at times, which I’ve pinpointed to actually be my phone’s problem. Generally a restart of my phone will get the WiFi working again. If that’s not doing the trick, it might be worth sending your camera to Canon or a nearby repair shop to see if there’s something wrong with it. Worth a shot if you think WiFi might be useful (I use it quite often).
I give up on this stupid 6D. I’ve never been able to get it to connect with a phone, and following these instructions I get to the point where the app says “follow the instructions on your camera to continue,” but nothing comes up on the LCD. In fact, the menu on the camera freezes and I have to pull the battery to start over. I got frustrated with it 2 years ago when I first got the 6D and swore never to try again lest I get so mad I throw the 6D into my trash can. Today I threw it in the trash can and I can’t wait for my new Sony A7Rii to arrive in a couple of weeks! Goodbye Canon!!!